
Hi Crafty Friends!

Without beating the HSN thing into the ground, I thought it would be fun to share with you how some of the goodies on the table display were made! Today I thought I would show you pics of the Banner you saw on the front of the table.
Did you know Glue Arts Extreme Tac adhesive IS actually strong enough to actually hold Rosette Banners in place and you don’t have to burn your fingers with hot glue or hold each one together until it dries? YES! This is another reason why I love Glue Arts Glue Glider Pro so very very much!
Should we walk through how I made this personal and custom party banner with my Cricut?
First of all, I have to say, here is another reason why I love the Artiste Cricut Cartridge so very much! There are a ton of fancy pattern/design Rosettes in this cartridge and that is what I used to create this banner. Other things I used and You will need:
- Glue Glider Pro with Extreme Tac Cartridges

- Bright and Cheery Paper, I used the Paper Layerz Happy Dots and Bella Blvd Sunshine and Happiness Collection
- Bakers Twine
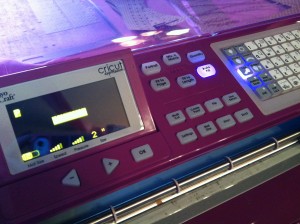
- Artiste Cricut Cartridge and Cricut Expression, Cricut Expression 2 or the Cricut Mini (the Cricut Imagine will work too! LOL)
- Bone Folder and Scor Board
- Sparkle Lightz
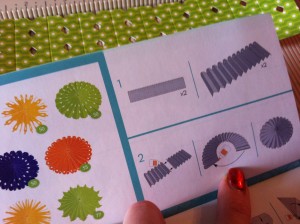
I started out by cutting 12 – 2″ rosette pieces from page 50 of the Artiste Cartridge handbook, I used Auto Fill to get as many on my 12×12 scrapbook paper as possible.
The cool thing about Artiste Cricut Cartridge is that it comes with an additional Instruction handbook for how to assemble all of the 3D and “assembly required” items in this Cartridge! It’s an amazing thing because many older cartridges do not provide such insight and you are left on your own, scratching your head going, how do I put this together?
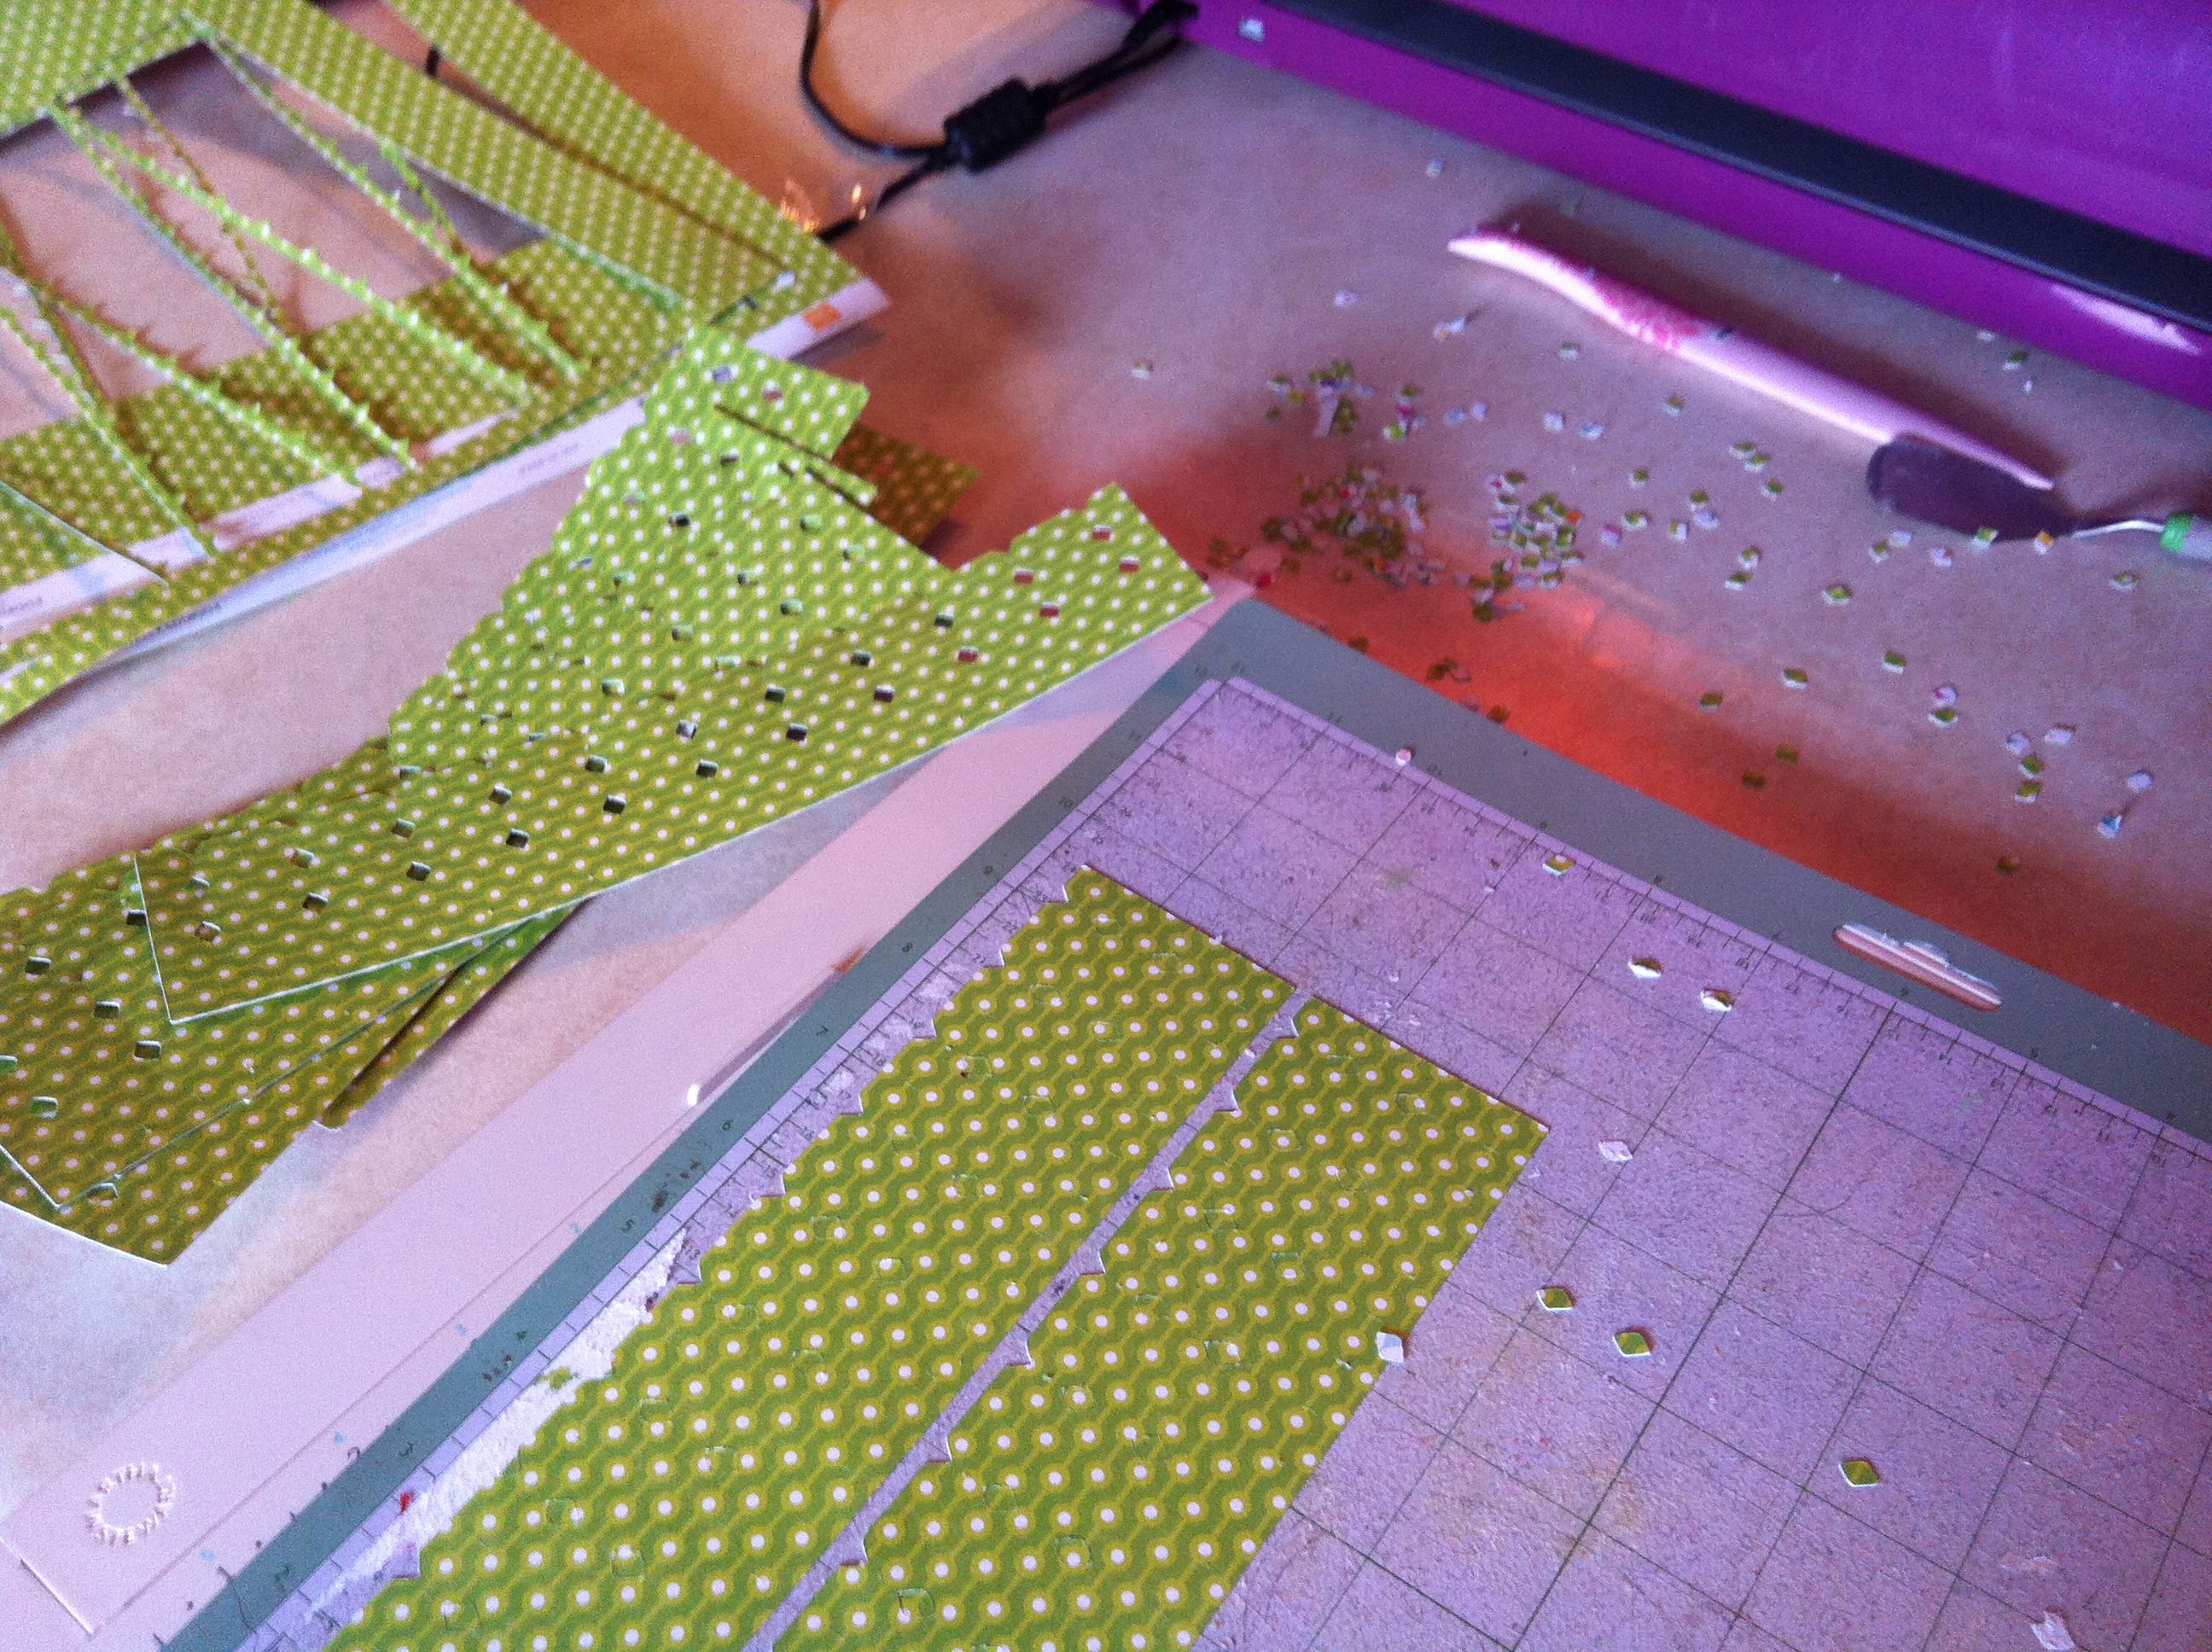
Lots and lots of little pieces to pull out and you can see many left on the cutting mat. Make sure and use the Cricut Cutting Guide for your paper to get just the right setting and make life easier with intricate cuts like this!
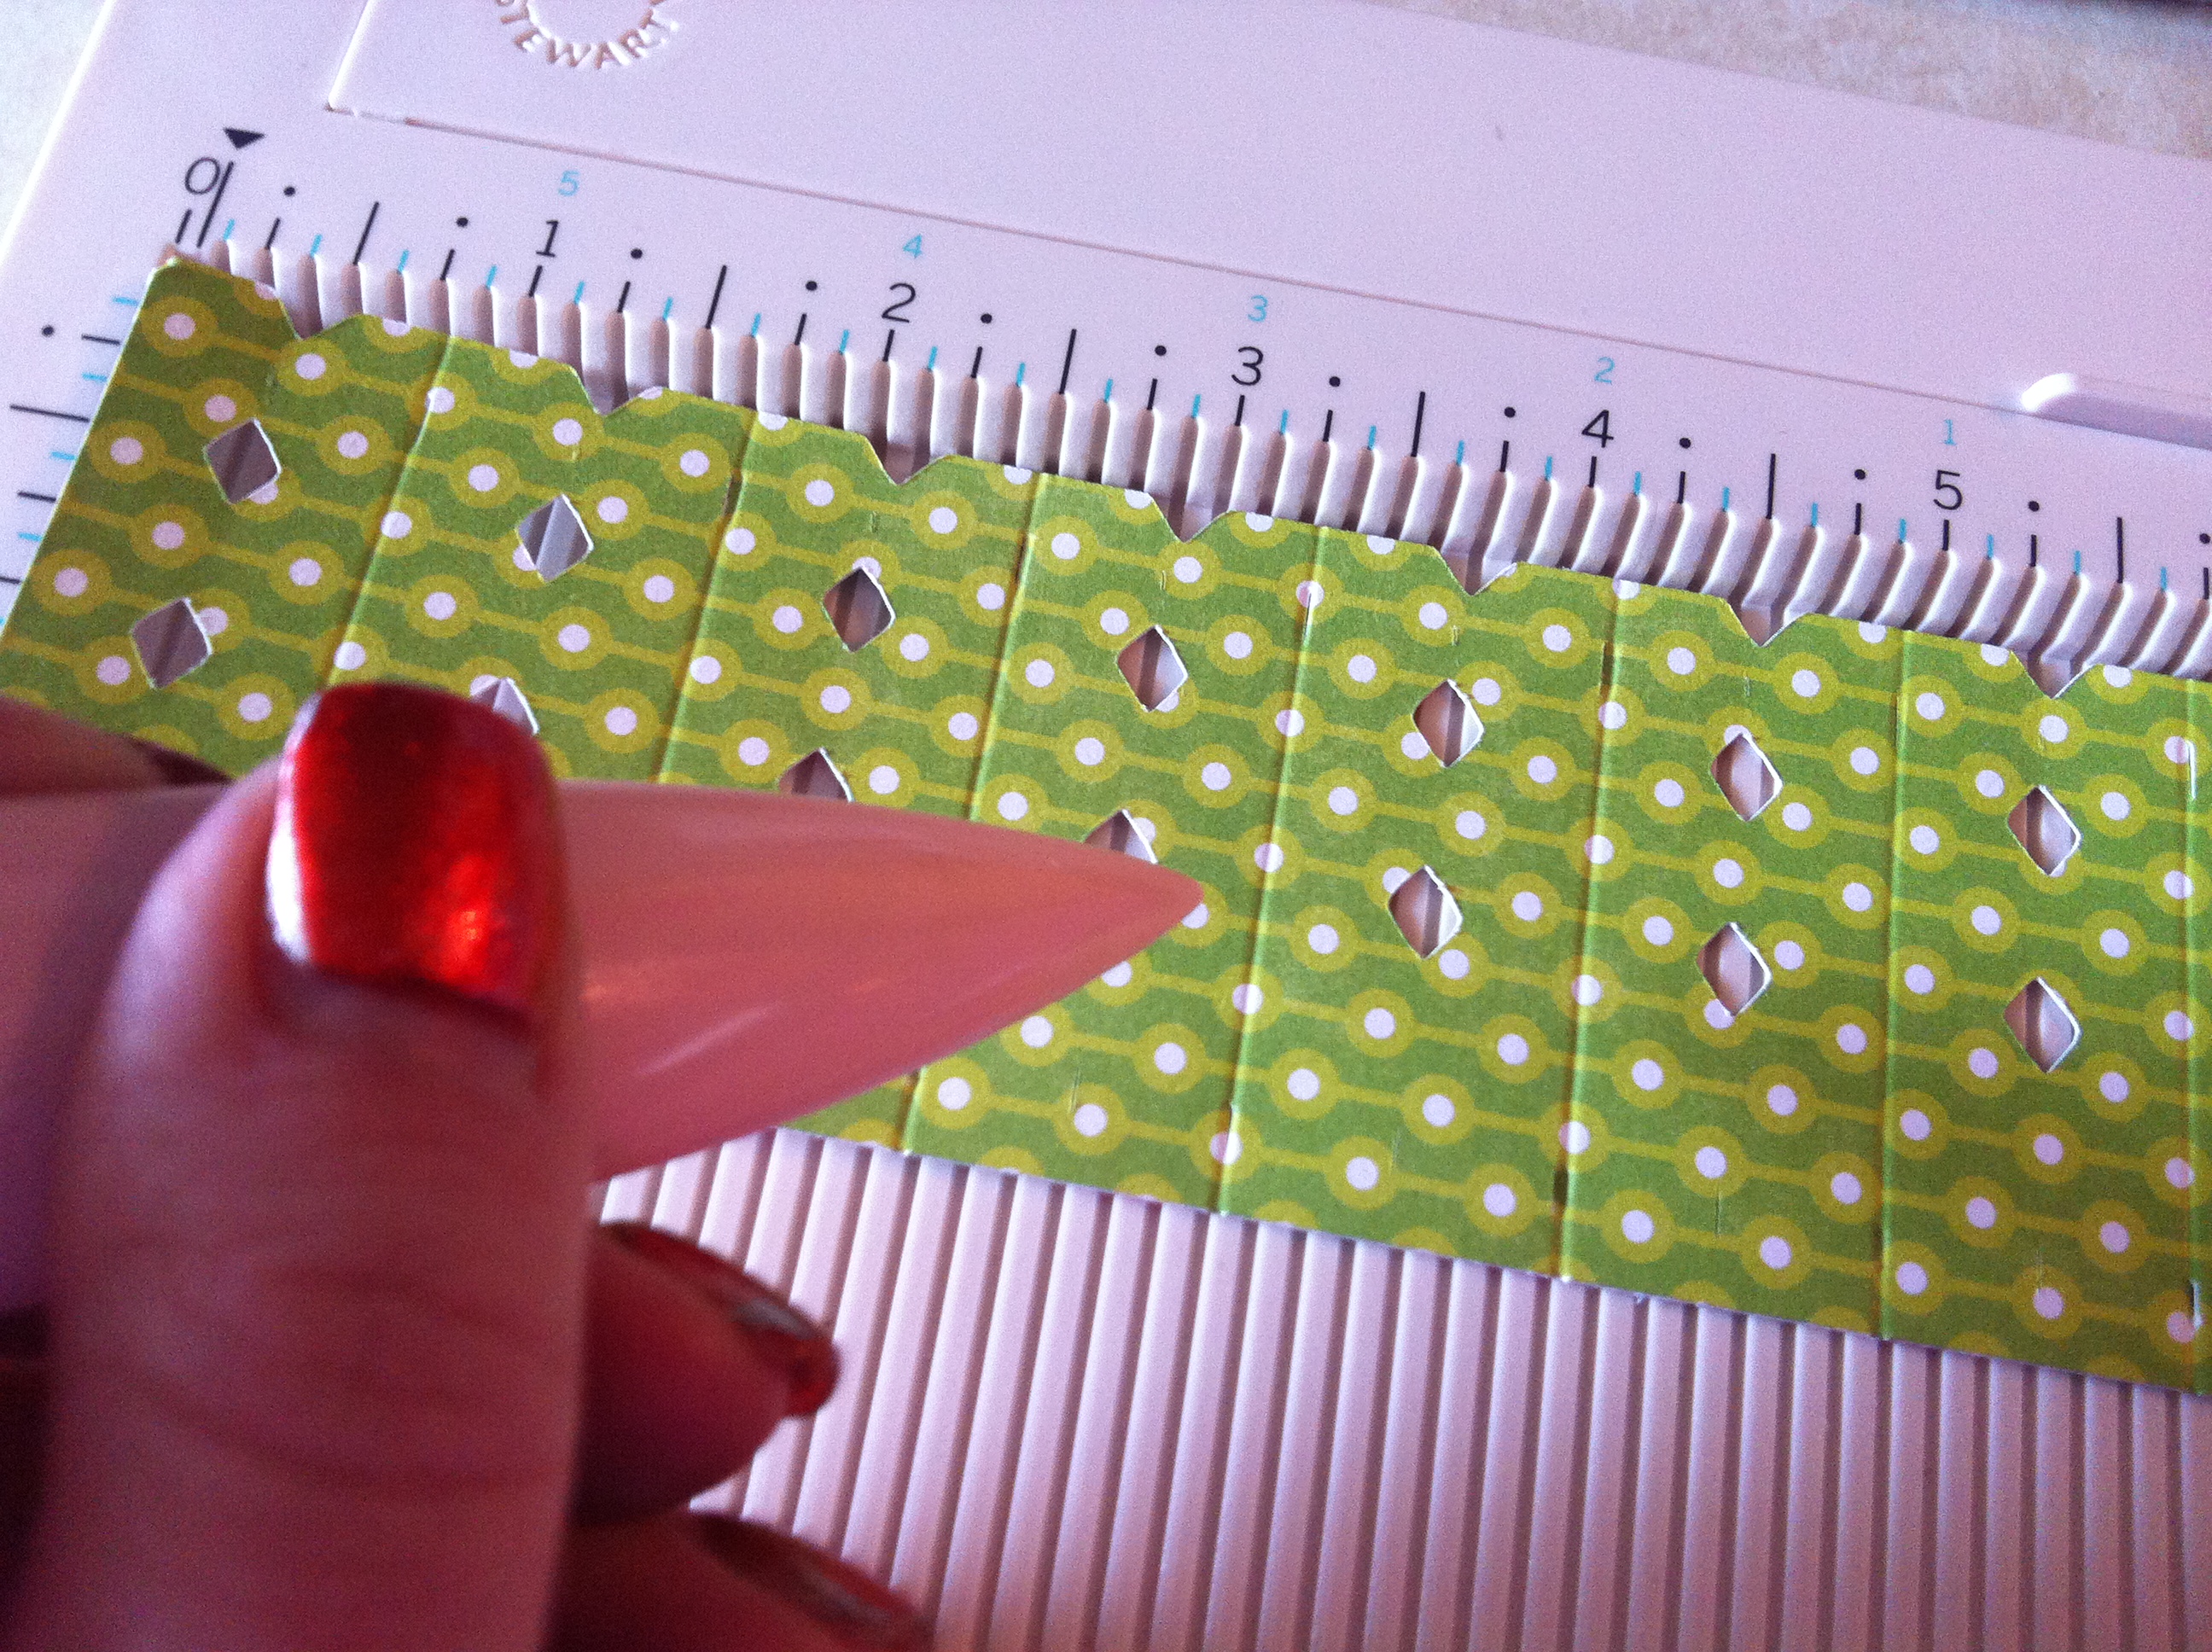
After you have all the rosette pieces cut out (you will need two for every one complete circle rosette you would like to make) use your score board and bone folder to follow the slight “cut lines” as to where to accordion style fold each piece.
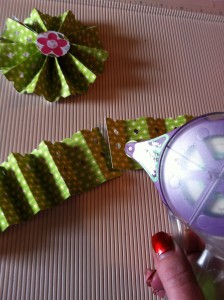
Once you have each piece scored, and folded grab your Glue Glider Pro and start assembling by glueing end to end into a circle. Cut out an additional 2″ circle as a base for the front AND BACK. Cover each circle completely with adhesive and place on the front and back of your rosette for complete stabilization. You can then add additional embellishments, letters to complete a word or name, whatever you would like!
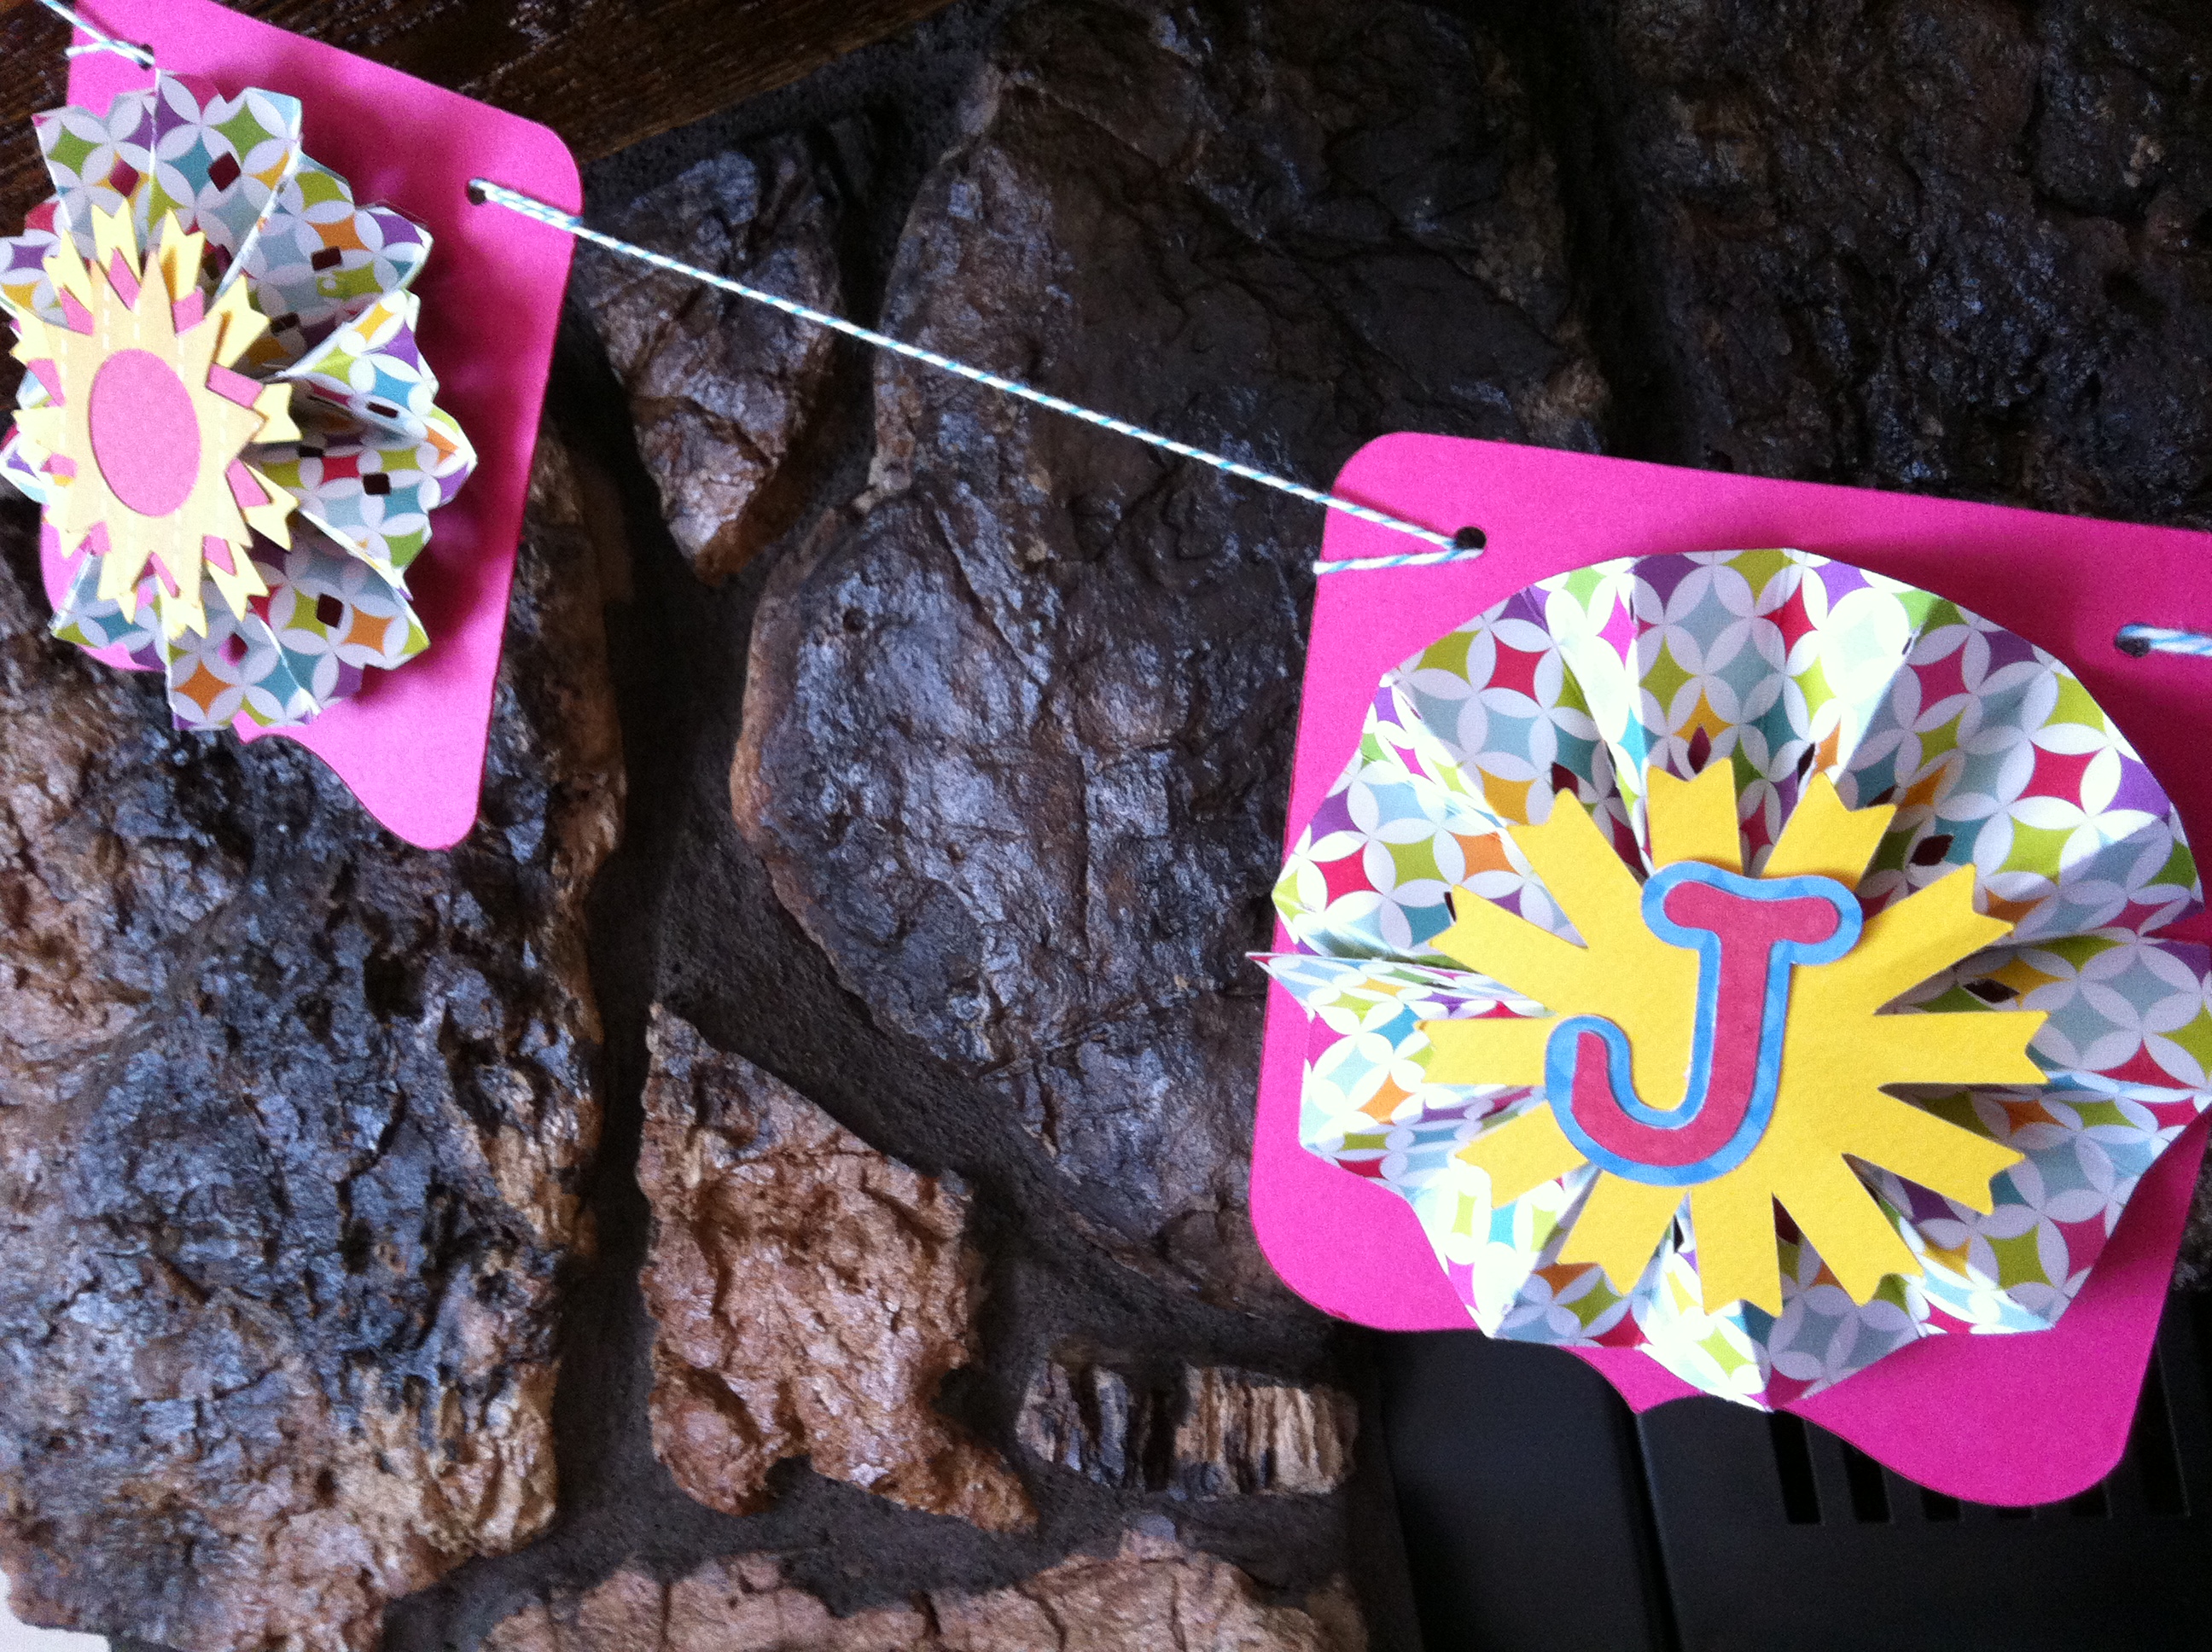
These banners always do seem to take longer than I THINK they will, which is why this isn’t a video tutorial. Allow yourself some time and patience, (I admit I can be lazy and loose it with projects that are repetitive and get bored if I’m doing the same thing for longer than 20 minutes) HOWEVER, these banners are personal and great for parties and worth it! I thought it looked really cute on our table for HSN and honestly – what other adhesive makes it so easy? I HATED when I made one before my glue glider because I had to hold each piece together and wait for it to dry and then still had it pop apart! I will warn you though – you need to use a LOT of the extreme tac. and use quality lighter pattern paper. Paper Layerz really is a great fit for this type of project!
I hope you enjoyed – I know it isn’t a video – so if you have questions about what I did and if I left out something that has confused you, let me know in the comments section of this post and I will do my best to answer!
Thank you so much for your support and love and taking time to stop by today!
ENJOY THE MOMENTS!
Love the banner.
Love the cartridge but it does not seem to be available in the UK..doh
Sarah I can the cartridge for you if you are willing to be for shipping to me and then you. Send me an email if you ar interested.
andiebearie@gmail.com
Meagan I watched you on HSH and you were a pro. You were Great and looked beautiful. You looked like you were the one working for HSH. Just super. Can’t wait til next time. God Bless.
Also watched you on your premier on HSN. Very, very professional. I did order the Glue Arts special. Can’t wait for it to get here.
So pretty!
Nha, You confused, Would’nt Ever believe it..YOU?? sure justnlike all of us. Where true Crafters come-is, this that…just IN the Starting..there is ther REAL perseverance.
Cause isn’t it in the START-ING that anything brings us OUT-of, or probs us, any of us throught oue FEARS…to make the move Towards,…whatever??? I think just as in anything it’s the PROCESS of the JOURNEY, from the conception of the idea, thru the process–but it’s IN-the Journey, that we are identified, with our strenghts! Sure some may think Ah it’s just crafting–but how-often hasn’t something we might have thought of or been Inspiried to make-or do…NOT turn—OUT,–NOT come-out, as we had seen it in our minds eye?—Yup this stuff 8s and can be strong, but I also like the RE-positioning–it seem that I have found that you CAN use it more than once-like when Your using dies’ and Ur cuttlebug. Then also the Extra Strong is great stuff for the Honey-Comb paper’s–it HOLDS that type of paper-too,and of course you do NEED to Hold it too…but NOT LONG-now this paper really can “Spring-Back”..just like what we will be doing this week-end…well some of us do…Thanks again. Say we need to remember to give-a-shout-out that the NEXT big Scrap Affair @ hsn WILL BE ON MARCH-25th…mark Ur Calanders Folks–That’s MARCH-25th ON HSN.
They”ll also have another Pre-Scrap-on the 23rd but i think it’s only 4am and 1pm!
GoodLuck to all of us out here! Peace2all-
Isn’t it spring forward!!??
I have never made a banner with rosette. My CTMH order will be here on Wednesday(YEAH!) with the Art Ph cart but not the Artist. Boo! Next time. Love the your banner.
I watched you on HSN and I loved your hair. I didn’t intend to buy the Glue Glider Pro. You were such a good salesperson I ordered it even though I have two other types glue dispensers.
Love it. I will try this. I also ordered when you were on and ordered double the amount so I would have a lot of it.
Very pretty. Thanks for sharing.
loved the banner… but are you gonna make a video tutorial… would be great… looking forward to seeing you on hsn…
god bless
Very pretty! I made a large glass jar full of these rosette flowers. I’ve even used edge punches to make them lacy. It looks great and decorative in the jar and ready to use when I need them.
Stunning rosettes & banner project.
U Rock, Megan. 🙂